
Showing posts with label cake. Show all posts
Showing posts with label cake. Show all posts
Wednesday, November 16, 2011
Cake for MIT Lindy Hop Society's 10-year anniversary


Tuesday, June 07, 2011

Thursday, March 10, 2011
Racetrack (Cars) cake for Alexander

Queen Amidala (Barbie) doll cake
 Made for a wonderful 6-year-old named Sophi's birthday. The cake is 3 layers, carved to the shape of a dress, with a center hole for Barbie. Since I think those cake pick dolls are kind of creepy once you remove the cake, I wanted to use a real doll, so I wrapped the doll in plastic wrap to keep things as sterile as possible.
The headdress is assembled out of self-adhesive craft foam sheets with a rhinestone added. I styled the doll's hair as much like Amidala's as possible but did not paint her face (on purpose -- we wanted to keep the doll looking more like its recipient than accurate to Star Wars).
The dress is made of red fondant with piped trim and gold doily details.
Wednesday, November 10, 2010
Piano cake and cupcakes

(Photo by Aslan Askarov.)
Tuesday, May 18, 2010
Black cat sugar sculpture
 My first ever sugar sculpture for my friend Tina's big 40th birthday bash... This is her cat, Molly, made out of gum paste, based on a photo shoot of the real Molly posing on a plaid tablecloth with flowers. The plaid rug/tablecloth is also gum paste and the roses are piped buttercream (also my first time making roses).
For the black cat, instead of trying to color the paste black, I sculpted it white, let it dry (completely!) then painted it with a mixture of black icing color and vodka.
Tuesday, May 04, 2010
Monday, April 19, 2010
Ikura salmon roll sushi cake
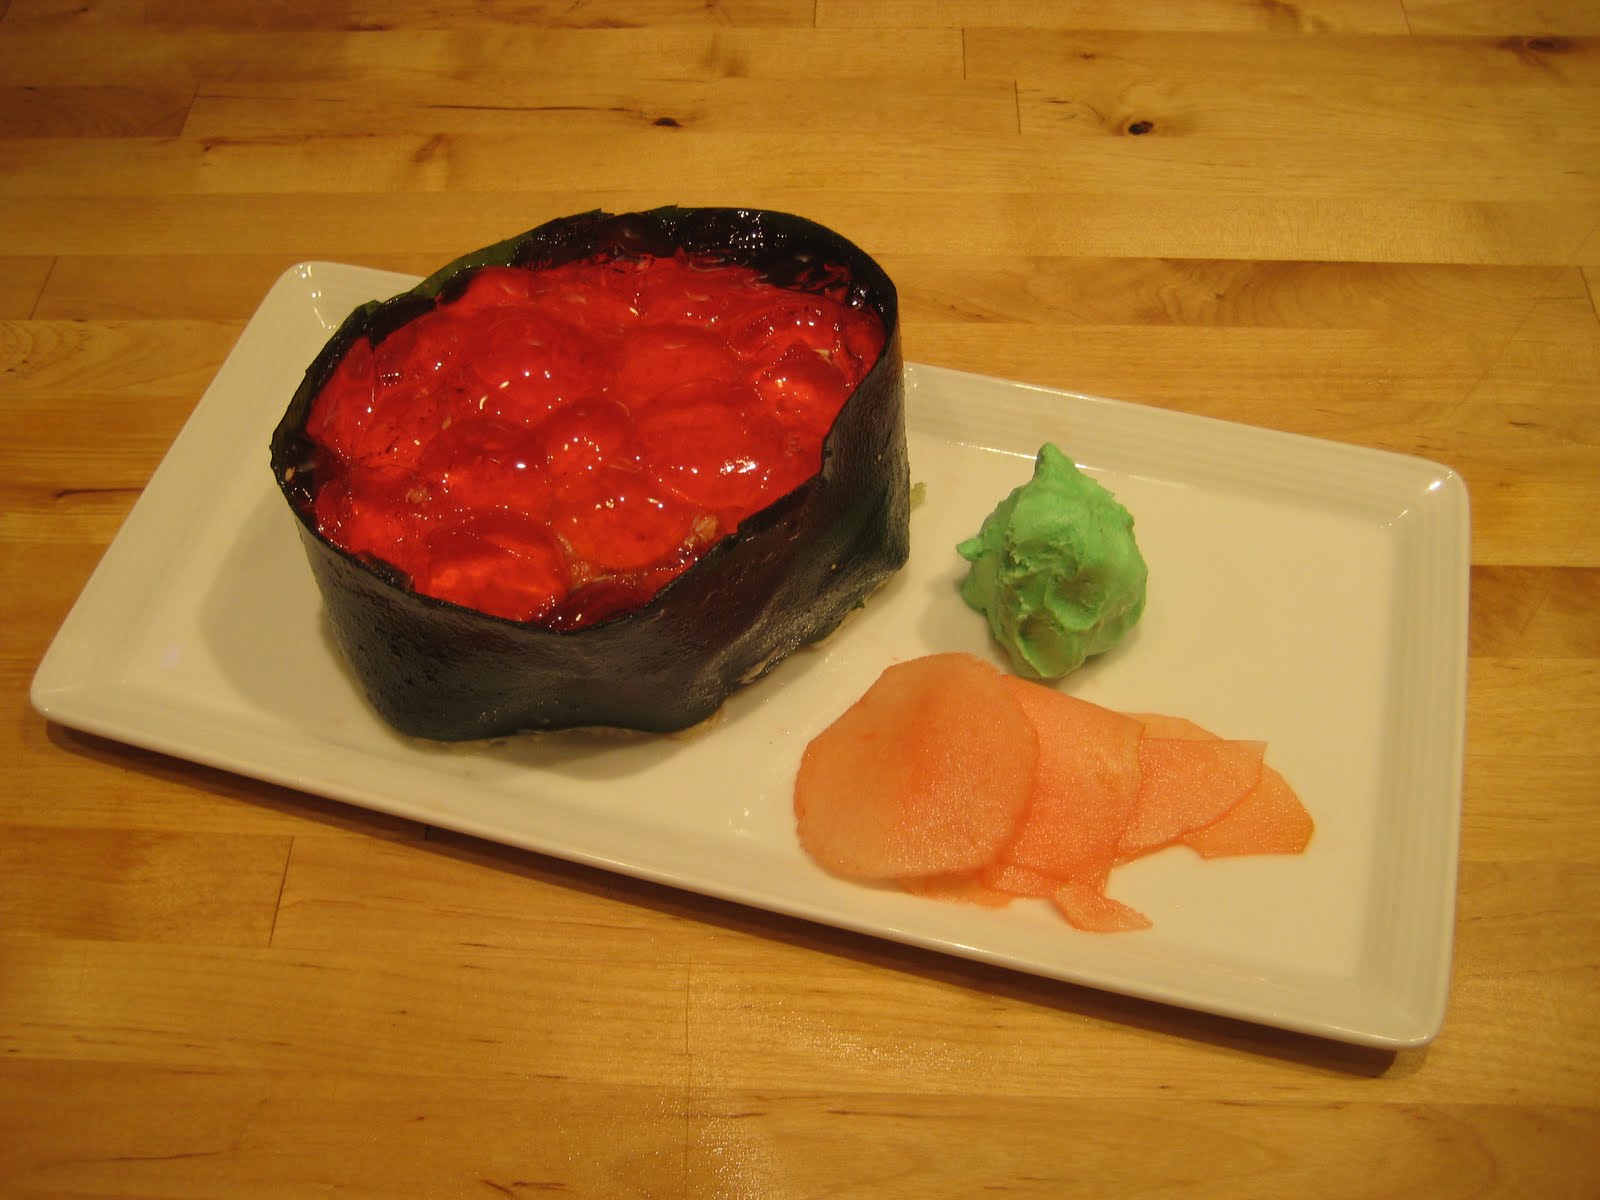 Another "cake that looks like meat" project... large and small Ikura roll cakes! The cake part of this project was very simple, but creating the nori (seaweed wrap) and ikura (salmon roe) presented more of a challenge.
There's already an ikura sushi cake tutorial on the Internet, and I followed the same basic principles but tweaked mine to make it look more like an actual piece of ikura sushi. Here's what went into it:
- Cake: Betty Crocker white cake mix. Two circular cakes with the edges trimmed off, layered. I used the trimmed edges to build the smaller cake, which you can see in the large picture.
- Buttercream frosting between layers and on the outside of the cake
- Shredded coconut around the top edge for "rice"
- Nori: Homemade fruit leather (like a Fruit Roll-up) made out of applesauce, pear, blackberries, and lemon juice with green food coloring. You could use store bought fruit leather if you can find the right color. There are also many recipes online. I used scissors to cut it to the right size.
- Roe: Jello molded in half circles. An egg holder or carton with rounded sections would be ideal for molding the Jello, but I couldn't find one, so I ended up using the blister pack from a multi-pack of small bouncy balls! The larger Jello balls ended up falling apart under their own weight, so I would recommend using a heavier gelatin mixture just for looks. However, the tropical fruit Jello tasted nice.
- Ginger: Apple sliced thin on a mandoline, soaked in lemon juice with sugar and a little red food color
- Wasabi: Buttercream frosting with green food color
- Soy sauce: Espresso with rum and sugar

Tuesday, April 13, 2010
Steak cake and bacon cookies


For a cookout billed as "Because meat is tasty," I decided to have some fun making desserts that look like meat. The bacon cookies are based on the excellent instructions from Eleventy. The cake (which my friend says I should call "beefcake") is my own idea, although I found a lot of pictures of other steak cakes online. It's basically a red velvet cake with red and white icing, strategically piped and smoothed into position using a spatula and a small paintbrush.
Wednesday, April 07, 2010
Ukulele cake

 So, I play the ukulele, as do many of my friends these days. It's one of my favorite things in the world. For my friend Jasmine's birthday, I decided to build a ukulele cake. This turned out to be a pretty easy (and fun!) project which I made with a little help from other uke-playing friends, Vichu and Lou. (You can see Vichu crumb coating the cake in the small photo. Lou iced the neck with chocolate fudge icing.) Overall, I'm pretty happy with the finished result even though it could have been neater if I'd had more time.
Basically, we baked a sheet cake and a few small loaf-sized cakes. I only ended up needing one of those, for the neck. The headstock is made using one of the leftover bits I carved off of the sheet cake when I cut the body of the uke. The pattern for the uke body was made by
 tracing my Mahalo ukulele, and then I transferred that to the cake by punching around it with a knife.
The tuning knobs are lollipops and the bridge is a section of a chocolate bar. The soundhole is made using cocoa powder sprinkled into a ring mold (Vichu's idea, which worked great, although cocoa powder went everywhere when Jasmine blew out the candles!). Everything else is pretty much frosting, dyed green or piped.
Also, I think the finished cake with burning candles has kind of a Jimi Hendrix thing going on!


Saturday, February 21, 2009
Appa cake
 Back in December, I became obsessed with the idea of making a cake in the shape of Appa, the flying bison from Avatar: The Last Airbender. With help of my more experienced cake-making friend, Fran, I set out to make the Appa cake.
These photos illustrate the process starting from two boxed cake mixes and four pans, to assembling and decorating the bison.


 We started with one flat 8.5x11 pan, one small loaf pan, and two domes (from the Wilton "sports ball" kit.) With some trimming, the flat cake became Appa's body and tail. The loaf was cut into six equal slices, which we laid flat to create Appa's six legs. After a coat of thin icing, we layered the domes to create Appa's head and "hump." (We trimmed the rounded top off the "hump" dome and used it to bolster the head dome. This also helped create the shape of Appa's face.) We used the corner scraps from the flat cake to create his puffy cheeks, and a trimming from the front of the "hump" to help round out his tail.
Next, Fran iced the whole thing, and we piped a little extra icing into any spots that needed smoothing. A thorough coating of shredded coconut helped hide any remaining flaws, and created Appa's shaggy fur.

I had puzzled a long time about how to best make the brown arrow/stripe down Appa's back. After deliberating over using store-bought fondant, making my own fondant, or attempting to do a neat job with icing, I went with an online recipe for marshmallow fondant. (I added cocoa and food coloring to make it chocolatey and brown.) This was a very messy step and I thought the fondant would be too sticky to use, but after much kneading and adding of powdered sugar, it magically acquired a Play-Doh consistency. We rolled out the fondant to cut Appa's stripe.
I also used a large amount of the fondant to sculpt the horns. I left the horns in the freezer for several hours, then dipped them in melted dark chocolate. (I say "dipped," but really it was more like painting the chocolate onto the horns.) They went back into the freezer to harden, then were attached with toothpicks. The horns still had a little trouble staying in place, and you can see them sagging
 in some of the later pictures, unfortunately.
Appa's toes were made out of chocolate-covered almonds. I frosted his cheeks with chocolate icing, then cut another piece of the fondant for his nose and coated it with black icing from a store-bought icing pen. His eyes were made from chocolate-covered espresso beans dipped into the white frosting, then pushed into his face; I dotted black and white icing with a toothpick to create pupils and highlights.
 Lastly, Appa's ears are created from large marshmallows sliced on the diagonal, coated in icing and coconut on top and chocolate icing on the bottom, and attached with toothpicks. Another marshmallow was cut in half and covered in icing/coconut to give Appa a lower jaw.
The whole project took two nights to complete, but it was worth it; many people thought we must be professional pastry chefs! :)
Subscribe to:
Posts (Atom)